Re-Fit
Having taken the boat apart from the bathroom to the front door with the act now think later stratergy I had to do some serious rebuilding.
The kitchen came first. I was planning to make the cabinets myself, but one small experiment led me rapidly to B&Q for pre manufactured units. They are seriously easy to fit.
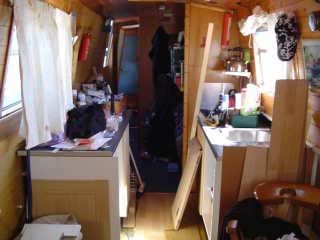
Next came the floor at the front of the boat. I had assistance for this!
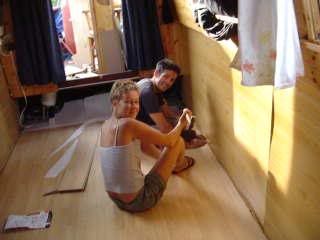
Laying the floor wasn't as simple as it could have been. The watertank that was in this area sat on the hull base, which meant there was a hole in the floor - which didn't prove easy to fill up and make level. Thanks for a bit of experimentation it worked out ok in the end. I was delighted to have assistance on this day, there is no way I could have done it on my own!
Having put a lovely floor down the rest of the boat began to look very old and tired. Living in a workshop was also having its affect, and I just didn't know what to do about the whole environment so, on the advise of a couple of people, and to the horror of others I did what I would NEVER have done normally and picked up a paint brush. The boat went from this:
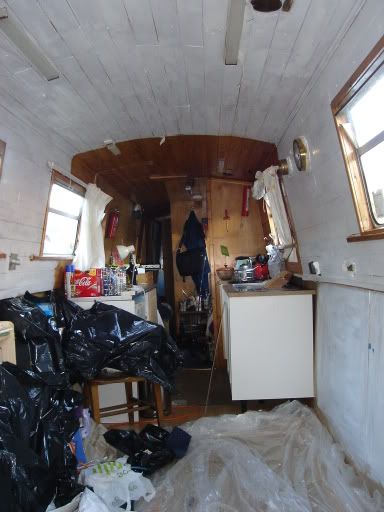
to this:

I am still a bit tentative about having painted the inside of the boat, however, on reflection I think it was the best thing I did. The woodwork was tired, and short of pulling it all off and doing it properly there wasn't much I could do with it. I felt I had enough work to do without doing that, so paint it was.
I will post some finished product pictures in my next post.
The kitchen came first. I was planning to make the cabinets myself, but one small experiment led me rapidly to B&Q for pre manufactured units. They are seriously easy to fit.
Next came the floor at the front of the boat. I had assistance for this!
Laying the floor wasn't as simple as it could have been. The watertank that was in this area sat on the hull base, which meant there was a hole in the floor - which didn't prove easy to fill up and make level. Thanks for a bit of experimentation it worked out ok in the end. I was delighted to have assistance on this day, there is no way I could have done it on my own!
Having put a lovely floor down the rest of the boat began to look very old and tired. Living in a workshop was also having its affect, and I just didn't know what to do about the whole environment so, on the advise of a couple of people, and to the horror of others I did what I would NEVER have done normally and picked up a paint brush. The boat went from this:
to this:
I am still a bit tentative about having painted the inside of the boat, however, on reflection I think it was the best thing I did. The woodwork was tired, and short of pulling it all off and doing it properly there wasn't much I could do with it. I felt I had enough work to do without doing that, so paint it was.
I will post some finished product pictures in my next post.
posted by MortimerBones at
11:54 AM
![]()


0 Comments:
Post a Comment
Subscribe to Post Comments [Atom]
<< Home